
Contact Support
While AskLuci team isn’t available 24/7, we’re dedicated to gathering your questions and feedback to help your business achieve meaningful, long-term improvements — rather than just quick fixes.
We handle:
• 🚨 Urgent bugs or glitches — let us know ASAP so we can jump in.
• 📑 Standard Operating Procedure (SOP) questions — if you can’t find a process in the Knowledge Hub, let us know and we’ll investigate and create it.
• ❓ General questions — about features, usage, or anything else.
We batch most SOPs and general questions and aim to answer them weekly or fortnightly.
This ensures we’re focused on supporting your clinic effectively and improving the product for everyone.
Please fill out the form below to let us know what’s on your mind, and our team will get back to you as soon as possible.

How to Record Screen on your Mac?
You can use Screenshot or QuickTime player to make a video recording of the entire screen or just a selected portion of it.
Use the Screenshot app
Requires macOS Mojave 10.14 or later

Open the Screenshot app by pressing these three keys together: Shift, Command and 5.
You should see an on-screen toolbar with three controls forcapturing a still imageof your screen, followed by these two controls for recording a video of the screen:
-Record Entire Screen
-Record Selected Portion. You can adjust the selected portion by dragging its borders with your mouse or trackpad.
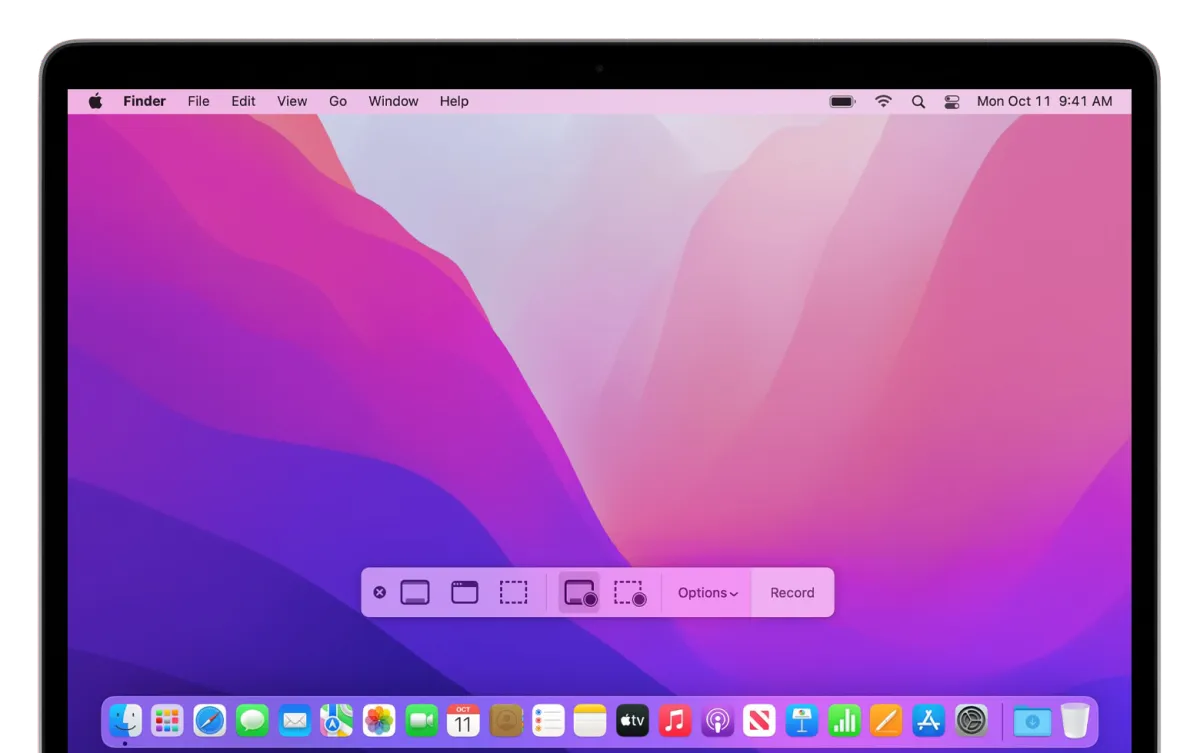
Before starting your recording, you can click Options in the toolbar to change the recording settings:
-To record your voice or other audio with the screen recording, choose a microphone.
-To show a black circle around your pointer when you click, choose Show Mouse Clicks.
-To set a recording timer, choose the number of seconds to wait before recording begins after you click Record.
-To change where the recording will be saved after you stop recording, choose a different “Save to” location. By default, recordings are saved to your desktop.
To begin recording, click the Record button in the Screenshot toolbar.
To stop recording, click theStop buttonin the menu bar, or press Command-Control-Esc (Escape).
When you see a thumbnail of the recording in the corner of your screen, click it to edit the recording. Or wait for the recording to save to your desktop.
Use QuickTime Player
Open QuickTime Player from your Applications folder.
From the menu bar, choose File > New Screen Recording. Or press Control-Command-N
-.If you see theonscreen controls described above, screen recording on your Mac is performed by the Screenshot app. Follow the steps in the previous section.
-If you see the Screen Recording window described below, screen recording on your Mac is performed by QuickTime Player. Continue to the next step.
Before starting your recording, you can click the arrow next to theRecord buttonto change the recording settings:
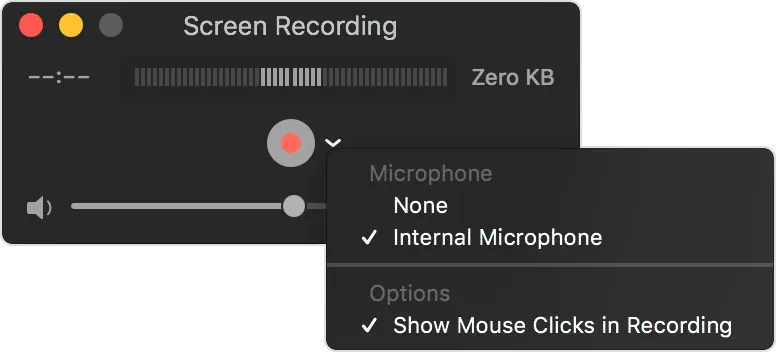
-To record your voice or other audio with the screen recording, choose a microphone. To monitor that audio while recording, adjust the volume slider. If you get audio feedback, lower the volume or use headphones with a microphone.
-To show a black circle around your pointer when you click, choose Show Mouse Clicks in Recording.
To start recording, click the Record button and then take one of these actions:
-Click anywhere on the screen to start recording the entire screen.
-Or drag to select an area to record, then click Start Recording within that area.
To stop recording, click the Stop button in the menu bar, or press Command-Control-Esc (Escape).
After you've stopped recording, QuickTime Player will automatically open the recording. You can now play, edit or share the recording.
Learn more
-When saving your recording automatically, your Mac uses the name ”Screen Recording [date] at [time].mov”.
-To cancel making a recording in the Screenshot app or QuickTime Player, press the Esc key before you click Record.
-You can open screen recordings with QuickTime Player, iMovie and other apps that can edit or view videos.
-Some apps may not let you record their windows.